💻
alt:V Athena Docs v3.0.0
  • Info
    • Introduction
    • Patreon & Support
    • Athena Discord
    • FAQ
  • Installation
    • Common Issues
    • Windows
    • Linux (Ubuntu 20.04+)
    • Debugging
    • Updating
  • Info
    • Admin
    • Configuration
    • Console
    • Database
    • Hotkeys
    • Identifier
  • Plugins
    • Load Plugins
    • Create Plugins
    • Mods
    • Clothing
  • Controllers
    • What is a Controller?
    • Blip Controller
    • Interaction Controller
    • Marker Controller
    • Object Controller
    • Ped Controller
    • Text Label Controller
    • World Notification Controller
  • Systems
    • Interiors
    • Inventory & Items
    • Inventory Rules
    • Jobs
    • Time
    • Weather
  • Menus
    • Menu Types
    • Action Menus
    • Input Menu
    • Wheel Menu
  • Player
    • Admin-Commands
    • Animations
    • Attach Objects
    • Credits
    • Currency
    • Commands
    • Error Screen
    • Message
    • Meta
    • Notifications
    • Particle
    • Progress Bar
    • Save
    • Shard
    • Sound
    • Spinners
    • Task Timeline
  • Custom WebViews
    • Introduction
    • Your First Page
    • CSS Framework
  • Misc
    • Custom Sounds
    • Custom Streamers
    • Custom Icons
    • Adding Locale / Translations
    • Adding Vehicle Rules
    • Adding Whitelist
    • Adding Wheel Menus
    • Adding Parking Garages
Powered by GitBook
On this page
  • Copy the Template
  • Create Template.vue
  • Turn on Developer Mode for Webviews
  • Writing the HTML
  • Creating Clickable Things
  • How to Send Events
  • How to Receive Events
  • How to Setup the Page for Client
  • Setting up the Copied View Template
Edit on GitHub
  1. Custom WebViews

Your First Page

PreviousIntroductionNextCSS Framework

Last updated 3 years ago

Writing your first page can be a bit confusing but this tutorial should cover the very basics of your page.

Copy the Template

Let's start off by navigating to the following directory:

src/core/plugins

Create a folder called test.

Inside of that folder create another folder called webview.

You may need to shut down npm run vue-dev to get this to work as well as the server.

Create Template.vue

Turn on Developer Mode for Webviews

In the console type npm run vue-dev. It will open a vue development server. Navigate to https://localhost:3000 in your browser to see the WebViews.

If you hover on the left-hand side of the page you will get a menu to see all currently loaded WebViews.

Writing the HTML

The page automatically comes with a handful of comments built-in. A Vue page is split into three sections though. The top section with <template></template> is for writing your HTML.

However, the caveat with this is that you must always have only 1 <div> element immediately inside of <template>. Check the examples below for more information.

Invalid

<template>
    <div class="header"></div>
    <div class="footer"></div>
</template>

This is not correct. Do not do this.

Valid

<template>
    <div class="wrapper">
        <div class="header"></div>
        <div class="footer"></div>
    </div>
</template>

This is correct. Do this.

Creating Clickable Things

By default Athena comes with its very own custom css and built-in components. The template should have automatically imported Components that you can use anywhere inside of your page.

It's best to look at the other Pages to see how Components are used.

Here's how to create a button.

<template>
    <div class="wrapper">
        <Button color="blue">
            Hello World
        </Button>
    </div>
</template>

After saving the page you should see something like this...
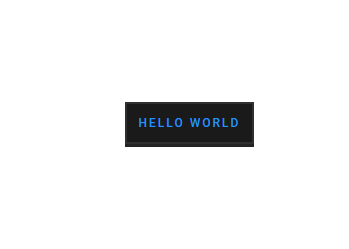
Now we can make the button clickable by adding the attribute @click="someMethodName".

<template>
    <div class="wrapper" @click="someMethodName">
        <Button color="blue">
            Hello World
        </Button>
    </div>
</template>

Now we just need to add the method called someMethodName so in your Vue template scroll down until you find methods: { inside the Vue Component.
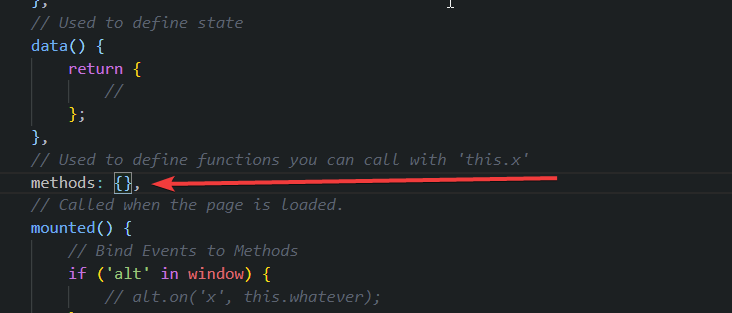
We are going to create a custom function inside of it.

data() {
    return {
        increment = 0;
    }
},
methods: {
    someMethodName() {
        this.increment += 1;
    }
},

Now we can refresh the page to get the method to be recongized. When you click the button nothing will happen or display so let's display our increment in the HTML.

<template>
    <div class="wrapper" @click="someMethodName">
        <span class="green--text">{{ increment }}</span>
        <Button color="blue" class="mt-4">
            Add
        </Button>
    </div>
</template>

As we continue to press the button the value of increment will increase.

How to Send Events

To send an event to the client we use the following template inside of a method.

if ('alt' in window) {
    alt.emit('helloFromWebView');
}

We can send additional arguments along with the event.

if ('alt' in window) {
    alt.emit('helloFromWebView', arg1, arg2, arg3);
}

How to Receive Events

Receiving events should be done inside of the mounted() function in the Vue Template. What we need to do is bind an event name to a method.

data() {
    return {
        first: '',
        last: ''
    }
},
mounted() {
    if ('alt' in window) {
        // 1. This event is called from client-side
        alt.on('setName', this.doSomething);
    }
},
unmounted() {
    if ('alt' in window) {
        alt.off('setName', this.doSomething);
    }
}
methods: {
    // 2. Which triggers this method.
    doSomething(firstName: string, lastName: string) {
        // 3. Which sets these values in our state.
        this.first = firstName;
        this.last = lastName;

        // 4. We can then access {{ first }} and {{ last }}
        // inside of our HTML and inside of our methods.
        this.saySomething();
    },
    saySomething() {
        console.log(`You updated First Name to: ${this.first}`)
    }
}

How to Setup the Page for Client

The final step in our test page is to get it working in-game. Which can be done by copying the template from the following path:

src/core/client/views/template.ts

You should copy this file and rename it to anything you want. You can move it to client-plugins or just keep it in the same folder. However, moving it out of the directory will mean you will need to update the imports at the top of the file according to your folder structure.

That being said make sure you IMPORT THIS FILE somewhere so that client-side recognizes it. This is something you do by doing basic TypeScript or JavaScript.

Look at src/core/client/startup.ts for more information.

Setting up the Copied View Template

Change the following variable inside your copied template.ts.

const PAGE_NAME = 'Template';

Make this match what your Vue ComponentName was set to. In the example above it was Test.

Read through the comments in the template to get a better understanding of what is going on inside.

As always you can look at the other pages to get general information about how things are done.

**The template does not include a way to open it. If you want a way to quickly test it. Create a command on server-side that emits a client-side event that calls the TemplateView.open function.

Good Luck!

and copy the raw code into Template.vue.

Visit this website
Your First Page
Copy the Template
Create Template.vue
Turn on Developer Mode for Webviews
Writing the HTML
Creating Clickable Things
How to Send Events
How to Receive Events
How to Setup the Page for Client
Setting up the Copied View Template